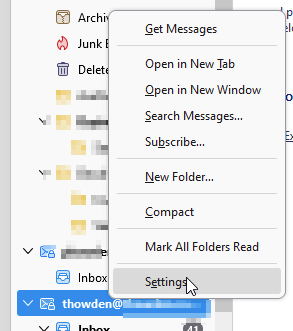
Author: Tony Howden

  • Thunderbird Mail Connection to Server Timed Out

    Using Thunderbird Mail and getting “Connection to Server Timed Out” message.

    In this instance, the server was changed and although it was meant to be identical to the old server, Thunderbird had trouble connecting.

    The users account on a CPanel server was migrated to a new CPanel server and everything was ok including access to webmail, but the Mozilla Thunderbird client was getting this “Connection to Server Timed Out” message.

    The resolution was in the Thunderbird settings for the account.

    Right-click the Mail account in Thunderbird and select Settings

    On the Settings screen select Edit SMTP server

    Check the port as using 465 Secure SMTP and Select SSL/TLS for the Connection Security.

    The assumption here is that your Server name and Username/email address are correct.

    Then select OK.

    Next set up for the Incoming email. While still in the Account Settings Panel select Server Settings.

    Check and set the Port as 993 for IMAP Secure connection and the Connection Security field to SSL/TLS.

    The new settings are automatically saved, there is no ‘Save’ button to push.

    Finally test the connection by asking to Subscribe and confirm that you have all the folders available from the server.

    If all is good you should have a list of subscribed folders appear pretty much instantly.

    In this instance the Server settings were using STARTTLS and Insecure port numbers which is where the connection was failing to the new server.

    I do not mention POP settings as we use IMAP exclusively. This ensures that all email history that might be needed by the client is available to any device or via webmail.

  • WooCommerce eBay Multichannel Inventory

    We manage a number of WordPress WooCommerce sites and recently looked into managing WooCommerce eBay Multichannel Inventory as a centralised system. The main concern with having more than one sales channel is the risk of running short of stock, having sold the same item on more than one channel.

    The following is not an exhaustive list, in fact it is limited to what we could find that seemed to fit the bill. Some of the products listed were just skimmed as there were apparent or obvious limitations.

    The main criteria I used were:

    • Centralised Inventory is crucial.
    • Must allow for existing eBay listings and existing WooCommerce product integration without loss of data
    • Must provide for eBay listing template(s) and the extended product attributes that eBay requires
    • Useful to have ability for multi-item listings in eBay

    In brief:

    There are two main types of WordPress WooCommerce plugins for centralised Inventory management.

    1. Fully integrated within your WordPress website with the management pages in the site.
    2. A SaaS application remotely hosted that keeps your data syncronised in the remote system.

    WP-Lister: I have used this one for a couple of years but it was complex to manage and I stopped using it. I have given it another chance in this review.

    Codisto: This was the product that I thought would work and configured a new WordPress WooCommerce install specifically to test it. Wow! What a waste of time. After this I looked for reviews in case it was just me, but TrustPilot Reviews of Codisto indicate I am not alone in my concerns. G2 Reviews of Codisto support similar comments. That said, recent updates to the Codisto site indicates that they have been bought out by Shopify and the product rebranded within the Shopify system. With WooCommerce considered a Shopify competitor the WooCommerce interface is not mentioned in the Shopify version. My guess is it will be left to wither and die. So skip Codisto regardless of how good it might appear. You should invest your time & money elsewhere.

    LitCommerce : This is one of the tools that relies on a cloud-hosted platform for storing your data and providing the data feeds in and out of the connected marketplaces like eBay and WooCommerce. It has some issues. Their eBay store categories interface is (Update: was) broken due to their developers mis-interpreting the eBayAPI instructions. (Granted, it did take me 3 or 4 reads to comprehend the language around how that field setting worked.) In any case, Store Category connections do not work at the moment and it is not because the eBay API is limited. Next up was trying to update some prices on my test listings and it cannot be done in LitCommerce. Update: After writing and posting this, I realised I was not understanding the ‘how’. Price updates are synchronised and via a template can be varied to different currencies for other channels. I am as of now a LitCommerce convert.

    CedCommerce : eBay/WooCommerce plugin. First issue is that this is a one to one relationship with eBay. Only a single account can be connected. A multi-account tool is also available but with a ‘Quote Only’ price model and no real detail it might not work as expected. In any case, using the single account version, we started with a small but annoying issue. The default connection does not recognise the eBay Business Policies for the account. This means that the plugin starts by prompting for the manual configuration of Refunds, Payments, and Shipping rules. Given that these already exist in eBay and I want them to apply automatically it is a negative from page 1. Following on I then looked at the Category mapping which LitCommerce failed on. CedCommerce operates correctly and presents all my store categories as expected, so a tick there. One annoyance is that the Store Category list is not in alphabetical order and with 75 categories it takes a bit of searching. I guess the SQL query is returned without any ‘ORDER BY’ instruction. Minor issue, but indicative of lazy coding. Next up I am mapping WooCommerce Categories to eBay Categories and this is painful. Every Category map is independent. Most of my products map into an eBay category 4 levels deep. 75 Categories x 4 means 300 selections plus scroll and click to Save. Too much time wasted. Next try to align existing eBay listings with WooCommerce listings. Nup, have to upgrade to the full product with a US$279 purchase price to see if it will work. That is not happening with a product that is already showing signs of not working. See Deactivate this on as well.

    WebKul : WooCommerce to eBay connector. This is an all or nothing approach. Import All product from eBay or export to ebay. From the demo it is not apparent that products are able to be mapped or aligned where they exist in both systems already. There are Syn settings available but this appears to be after a full import / export has taken place.

    Quickly dismissed were:

    Dokan : This pops up when searching because the key words are same/same but this product aims to make WordPress a Marketplace for other sellers that you manage rather than MultiChannel management.

    3D-Sellers : Highlighted as eBay to WooCommerce it appears to primarily use eBay as the source of truth for stock. Multiple eBay accounts cannot share stock, which means manual management of stock which is what we need to avoid.

    Expandly : This is just way too costly at this stage. Review at expandly.com.

    References:

    https://webappick.com/best-woocommerce-multichannel-selling-plugins/ This is a misleading review page as it is hosted by the creator of their #1 top-of-the-list product CTX Feed, so it is self-promotion.

    https://wordpress.org/plugins/litcommerce/ This one looked promising but failed with eBay shop categories. Update: After my initial post, I was contacted by LitCommerce Support to confirm a document I sent to explain how the eBay Categories worked as far as the API and in practice. Their dev team agreed with my assessment and modified the application. eBay Categories do work as expected.

  • mySQL Concatenation of Strings

    Error Code: 1292. Truncated incorrect DOUBLE value

    This was triggered by the random-ish appearance of this error code while trying what I thought should be a simple concatenation of two strings.

    The process within mySQL Concatenation of strings is not:

    SET @wholestring = 'this string' + 'this other string';

    Which does give the “Error Code: 1292. Truncated incorrect DOUBLE value” but….

    Use

    SET @wholestring = CONCAT('this string', 'this other string');

    And joy will be returned to your coding efforts.

    That said, note that this CONCAT example is with fixed strings.

    Using variables or constants in the CONCAT entries may trip you up if any of them are equal to NULL.

    SET @wholestring = CONCAT(@string1, @string2, @resultofSQLSELECT, @someothervalue);

    Will provide a NULL result in @wholestring, if ANY one (or more) of the values inside the CONCAT() equate to NULL.

    Reference: https://dev.mysql.com/doc/refman/8.0/en/string-functions.html#function_concat

  • WordPress Function add_theme_support( ‘html5’ ) was called incorrectly

    An annoying message appeared yesterday when we migrated a customer website to a new server.

    Notice: Function add_theme_support( ‘html5’ ) was called incorrectly. You need to pass an array of types.

    The site is an older build but seemed to be working in every other respect. So a quick dive into the WordPress documentation for add_theme_support() confirmed that the old theme was using an old format of the add_theme_support function. Checking within the theme files identified the offending line and offered a quick fix.

    // Add HTML5 markup structure
    // 20230417 thowden : this format is incorrect. 
    //add_theme_support( 'html5' );
    // it should call with an array like this:
    add_theme_support( 'html5', array( 'comment-list', 'comment-form', 'search-form', 'gallery', 'caption', 'style', 'script' ) );
    // end thowden

    The above modification was made and the site runs smoothly again. The actual details of the theme and the specific file are not relevant as this could affect any older WordPress theme install.

  • Creating SPF Records for your Domain

    The creation of a Sender Policy Framework (SPF) Record is something that is managed by the person or team that manages your Domain Name Service.

    The creation of an SPF record is a relatively simple process.

    Generally a domain name is hosted by a service provider like WrenMaxwell and it will be accessed via a control panel or interface that allows for the creation, editing or deletion of domain records.

    An SPF record is simply a text or TXT record within the domain. This is an example of a basic SPF record.

    Example SPF record

    In this example the domain is wrenmaxwell.com.au (note the trailing full stop in the record as the termination of the domain).

    The TTL or Time To Live provides the duration in seconds before this record should be checked again.

    IN TXT is the record type (cPanel / WHM management always shows the IN while other interfaces may not)

    The record content is enclosed in quote marks ( for cPanel / WHM this is standard. Other interfaces may hide the quotes or add the quotes in the background).

    What is in the SPF Record ?

    The example includes 3 settings:

    v=spf1  is the version of SPF that is being used. Currently there is only spf version 1 so spf1 is standard.

    +a says to accept the A record for the domain while +mx says accept the MX record for the domain.

    -all says to fail All Other servers sending email using this domain name.

    SPF Record Syntax

    After the version instruction the rest of the record consists of mechanisms and qualifiers.

    When an SPF record is queried, the receiving server checks the ip address of the sending server against the SPF record for the sending domain. If a mechanism matches the ip address then the qualifier for that mechanism is used to determine what action should be taken in relation to the specific email that is being processed.

    Mechanisms are always processed from left to right with each mechanism tested until a match is found. Once a match is found the query is stopped and the qualifier used to return the action or response to the receiving server.

    SPF Record Qualifiers

    The qualifiers are the symbols:

    Qualifier  Recommendation  Comment
    “-“Fail Fail tells the receiving server that the sending server is not allowed to send for this domain
    “+”Pass Pass tells the receiving server that the sending server is allowed to send for this domain
    “~”SoftFail SoftFail tells the receiving server that the sending server may be accepted but is not yet specified
    “?”Neutral Fail tells the receiving server that nothing is specified about this server
    Table of SPF Qualifier symbols

    There are a few other results that come from the evaluation of an SPF record but the above cover the main ones.

    SPF Record Mechanisms

    The are a number of mechanisms that are more commonly used and some that are not.

    Mechanism  Explanation  
      A or a All the A records for domain are tested. If the client IP is found among them, this mechanism matches.
     MX or mx All the MX records for domain are tested. If the client IP is found among them, this mechanism matches.
      IP4 Check a specific host IP address of type version 4
      IP6 Check a specific host IP address of type version 6
     include include:{some.other.domain} to check the SPF record of the hosting or remote domain
     all refers to any other server (all other servers) and this mechanism will always match
    Table of SPF Mechanisms

    MX stands for MaileXchanger meaning a server or host that will manage email for the domain.

    IP4 and IP6 refer to the type of IP address that is in use. A common error is to see IPv4 or IPv6 where the editor of the SPF record has inadvertently included the ‘v’ for version of the IP address, which is a common format in other forms of documentation of IP addresses but is invalid for SPF records.

    The include mechanism caters for larger configurations where there may be clustered servers or regular changes to mail server hosts and the service provider, like Google gmail and Microsoft Mail, can manage their servers within domain structure that is linked from the client (your) domain SPF record.

    The all mechanism should always be the last entry in an SPF record so that any other mechanisms are evaluated before this ‘catch-all’ mechanism is checked.

    For a full list of all SPF Mechanisms and other parameters refer to the openspf.org page on SPF Record Syntax.

    SPF Record Qualifiers and Mechanism Examples

    Using the wrenmaxwell.com.au SPF record as an example.

    SPF Record Example Settings
    SPF Record Example Settings

    The version instruction is standard. v=spf1

    The +a says check the A records for the domain “wrenmaxwell.com.au” and if the assigned host ip address matches then ‘+’ accept it.

    The +max says check the MX records for the domain “wrenmaxwell.com.au” and if the assigned host ip address matches then ‘+’ accept it.

    The -all says if the sending server is any other server then “-” fail the server and do not accept the email message as it is not an authorised server.

    SPF References

    Configuring Microsoft Office 365 SPF Records https://technet.microsoft.com/en-au/library/dn789058(v=exchg.150).aspx

    Scott Kitterman’s site at https://www.kitterman.com/spf/validate.html is a very useful set of tools.

    Summary

    Configuring a basic SPF record is not difficult if you are comfortable with managing your own DNS. If your email configuration is more complex than a single server or source of email, then there are many options that may be required to have a fully working SPF configuration. WrenMaxwell has been managing DNS systems for over 20 years and can assist you with your DNS support. Contact us any time for a free consultation.

    This post was first published in our HelpDesk Knowledgebase at https://help.wrenmaxwell.com.au/index.php?/Knowledgebase/Article/View/27/0/Creating-SPF-Records-for-your-Domain on 26th July 2016. The information is still valid with this update 12th July 2022.

  • Updating Logins with Microsoft Authenticator

    Over the last week I have had a number of issues with authentication and particularly ensuring that we have all our clients using MFA for Microsoft. Which lead to the title of this post “Updating Logins with Microsoft Authenticator”.

    Standard Microsoft Login Screen prompt.

    In my role as a client-facing systems administrator I have a lot of Microsoft accounts for various testing scenarios and administration functions. Using Microsoft Authenticator on my mobile as a primary 2-factor/multi-factor (2FA or MFA) tool is an obvious solution.

    During a session of checking documentation and validating account access I had a need to update a number of logins. As a result of logging into Microsoft around 20 times I have found that the quickest and easiest method to check or update any of the account information is with this link https://mysignins.microsoft.com/.

    Standard Microsoft Password screen prompt.

    What happens with that link ? First up it redirects to a https://login.microsoftonline.com/ OAuth2 URL and prompts for your login email or phone number.

    Enter an email address and select Next.

    Using the existing strong (long) passphrase. Yes, passphrase rather than password. I wrote a post on that topic many years ago and have updated it recently.

    After selecting Sign In the MFA login screen is shown, assuming you already had MFA configured. In my case I was unable to access some of these accounts via Authenticator due to swapping phones and having another phone break-down in the last 6 months, but I digress.

    Selecting in this case either to use the Authenticator, or an alternative method “Can’t use authenticator now” provides for a second confirmation of my identity.

    Using an alternative method assumes that you had originally configured other options like an email address or a phone number that can receive text messages.

    The “Don’t ask again for 180 days” option is not guaranteed. I have not confirmed it, but I am sure it is just a cookie in the browser and if you use different browsers for various tasks then the 180 days only applies on that computer or device and only for that web browser. Use another device or another web browser and you will be prompted again, potentially just 5 minutes later!

    So now that we are logged in, we are automatically re-routed back to the URL we started with which is https://mysignins.microsoft.com. Which looks like this with multiple panels and options.

    Microsoft https://mysignins.microsoft.com overview screenshot

    I’ll leave most of the options for another post as the one I needed to use today was the Security Info section.

    Microsoft https://mysignins.microsoft.com security info screenshot

    From here the process is fairly straight-forward. Select the + Add sign-in method, add a new phone, or Authenticator App, or email address for multi-factor authentication. Select the Default sign-in method, which I have set as Microsoft Authenticator. Its generally quick and simple, while an email takes a bit longer and requires copy/paste of a code or similar.

    Removal of an old authentication method, like my now-dead iphone 4, is as simple as hitting the Delete option.

    Another useful screen is the Organizations panel which helps when you have more than one organization that you deal with.

    Microsoft https://mysignins.microsoft.com organisations screenshot

    The only obvious thought here is that the Home organisation may change for some people and I am not sure what happens if you leave an organisation but have it as your Home? I will look at that another day.

  • WordPress wp-admin missing gui

    When moving WordPress sites around on servers and from a staging setup to live, we sometimes get bitten with “wordpress wp-admin missing gui” where the public view of the site is working fine, but the wp-admin areas shows up as plain text or simple html. You may not have seen it before, but plain white background and all the dashboard selections are simple links, like the theme is missing.

    Having gone through this several times in the last 4 or 5 weeks, I have decided I need to document what I tried and what worked in the end for the latest site issue. It could be different things and while I did not make a note the last few times, I’ll come back here in future if something different happens.

    We use CPanel for all our hosting servers and the WordPress Toolkit is installed.

    The task was a simple swap from staging to live which I do on a regular basis, and do it manually, as I have done for numerous years. However this time the dreaded “wordpress wp-admin missing gui” struck!

    Skipping the intervening hour of trying a multitude of settings, I discovered that this site was impacted by one of the WordPress Toolkit security settings. Which one, I do not know, as the final outcome was to revert or reset all the security settings and then enable 1 by 1 waiting to see which one failed, and none did!. Bah humbug.

    The outcome is then likely that somewhere in those settings, as I had copied the site manually into the public_html, had some setting that tied it back to the staging location, and ultimately crashed the theme. I expect that clearing the security settings (Revert) and re-enabling in one hit would have addressed the issue, but as with many things, we try incremental changes. If it happens again, I will try that first.

  • Delete and Add Back iPhone Mail Exchange Account

    A pictorial guide how to Delete and Add Back iPhone Mail Exchange Account.

    Why? Because you may stop being able to access your email. If your iPhone with an iOS later than v14 is still using an Exchange account with ExchangeActiveSync (EAS) as the authentication method then it is possible now and probable in October 2022 due to changes with authentication. Modern Authentication is going to be required. If your account on your iPhone was created ages ago and your iOS is being kept up to date, it is not automatically revising the authentication method. That will only happen with the deletion and add back (recreation) process.

    It is an easy process and with all the Office365 / Outlook data stored in the Microsoft servers, there should be no data loss, unless you have something outside the box configured on your phone.

    Note that this only applies to Apple Mail client on the iPhone. If you are using Outlook on the iPhone, then this solution is not for you.

    Start in the iPhone Settings screen. Mail -> Accounts

    Apple iPhone Add Delete Exchange Account
    Apple iPhone Add Delete Exchange Account Screenshot 1

    Then Select the account that uses EAS

    Apple iPhone Add Delete Exchange Account
    Apple iPhone Add Delete Exchange Account Screenshot 2

    The Delete that Account

    Apple iPhone Add Delete Exchange Account
    Apple iPhone Add Delete Exchange Account Screenshot 3

    Now start a fresh Add Account selection

    Apple iPhone Add Delete Exchange Account
    Apple iPhone Add Delete Exchange Account Screenshot 4

    Select an Exchange Account type

    Apple iPhone Add Delete Exchange Account
    Apple iPhone Add Delete Exchange Account Screenshot 5

    Enter your email account details and update the ‘Exchange’ description to something more meaningful

    Apple iPhone Add Delete Exchange Account
    Apple iPhone Add Delete Exchange Account Screenshot 6

    Select Next and then the Sign-In option to access the account

    Apple iPhone Add Delete Exchange Account
    Apple iPhone Add Delete Exchange Account Screenshot 7

    Select the options to Sync from Microsoft Office and Select Save

    Apple iPhone Add Delete Exchange Account
    Apple iPhone Add Delete Exchange Account Screenshot 8

    The account should now display in your accounts list.

    Apple iPhone Add Delete Exchange Account
    Apple iPhone Add Delete Exchange Account Screenshot 9

    Finally check your email and allow it some time to sync if you have a lot of mail.

    Apple iPhone Add Delete Exchange Account
    Apple iPhone Add Delete Exchange Account Screenshot 10

    This should not take any more than 5 minutes to complete even allowing for a slow internet connection. The end result will be that you are on Modern Authentication for Microsoft using Apple Mail client on an iPhone with iOS 12 or later, and preferably iOS15+.

  • ClamAV Archive.Test.Agent2-9953724-0 False Positive

    Like many others we rely on multiple AntiVirus tools and one of them is the ubiquitous ClamAV on our Linux hosting servers. Earlier today we started being hammered with ClamAV notices of viruses being identified. Some research later and we are confident the ClamAV Archive.Test.Agent2-9953724-0 is a False Positive.

    (quarantined to /home/quarantine/cxsuser/client-account/backup_2022-06-25-0330_Clientaccount_f4f78444ae93-themes.zip.1656132445_1) ClamAV detected virus = [Archive.Test.Agent2-9953724-0]

    Various internet sources confirmed that ClamAV had indeed released an update signature file which included a ‘Test’ signature, namely ‘Archive.Test.Agent2-9953724-0’. A subsequent update, released within 24 hours addressed the false positive and, hopefully, prevents any future signature file from containing Test signatures.

    # /usr/local/cpanel/3rdparty/bin/freshclam
    
    ClamAV update process started at Sat Jun 25 15:09:55 2022
    daily database available for update (local version: 26582, remote version: 26583)
    Current database is 1 version behind.
    Downloading database patch # 26583...
    Testing database: '/usr/local/cpanel/3rdparty/share/clamav/tmp.73d24b3a72/clamav-52f6105711bb0d74294d4d1c535e77c0.tmp-daily.cld' ...
    Database test passed.
    daily.cld updated (version: 26583, sigs: 1987677, f-level: 90, builder: cmarczewski)
    main.cld database is up-to-date (version: 62, sigs: 6647427, f-level: 90, builder: sigmgr)
    bytecode.cld database is up-to-date (version: 333, sigs: 92, f-level: 63, builder: awillia2)